
The Frustration of Stripped Nuts: A Step-by-Step Guide to Removing Snugly Stripped Nut
If you’re anything like me, you’ve probably experienced the frustrating encounter with a snugly stripped nut at some point or another. Whether it’s a stripped bolt, anchor, or lug nut, they can be a real headache to deal with. Fortunately, there are some reliable methods to remove snugly stripped nuts, and this article will walk you through the steps to successfully break free the stubborn fasteners.
Causes of Stripped Nuts
Before we dive into the removal process, let’s quickly identify the most common causes of stripped nuts. Stripping occurs when there’s inadequate torque applied or when using the wrong wrench or tool, resulting in the metal threads on the nut becoming damaged. The most common culprits are:
- Oversized washers or flat washers
- Incorrect usage of pliers or Allen wrench
- Poor quality fastener materials
- Pre-existing thread damage
Preparation is Key
Before attempting to remove the snugly stripped nut, make sure you’re equipped with the right tools:
- Good-quality wrench or socket: Look for wrenches with offset handles, which can generate more leverage and improve gripping power. Socket wrench sets with integral sockets and handle extensions are also helpful.
- Socket: Choose a socket that perfectly fits the nut. Having a larger socket (preferably an inch or so larger than the original washer) will help generate sufficient torque without damaging the stripped threads further.
- Socket extension or adaptor: Attach a socket extension or adapter to extend your reach, allowing for proper leverage on the nut without applying excess pressure to adjacent components.
- Penetrating lubricants: Use a good penetrating lubricant, such as WD-40 or lubricating grease, to fill the threaded area. Apply the lubricant thoroughly before attempting removal.
- Protection for adjacent parts: Secure any adjacent parts or surfaces with cloth wraps, paper towels, or a clean rag to protect them from damage.
Removal Methods
Employ one of the following strategies to break free the stubborn nut:
Method 1: Gradual Applying of Pressure
- Apply gentle, even force to the wrench, rotating it gradually in small clockwise increments.
- Once you’ve applied initial traction, carefully increase pressure to avoid snapping the threads completely.
- Keep steady pressure, rotating the nut in the same direction.
- Repeat the gradual pressure sequence until the nut begins to loosen.
Method 2: Inverse-Torqueing Method
- Loosely install the larger socket (chosen in the Preparation is Key section).
- Create a controlled, high-vibration area by gently pounding the end of the extension or the socket’s offset handle (using a gentle hammer, for instance) while gradually tightening the socket in tiny increments.
- Discontinue and re-start from the top, carefully removing the pressure and applying additional lubricant as needed to prevent scratching or scoring surrounding surfaces.
Tips for Success
- Patience and persistence are vital when removing snugly stripped nuts.
- Inspect your tools frequently, ensuring that they are firmly seated on the nut for maximum efficiency.
- Avoid sudden, intense pulling or forcing, which might further strip the nut.
Additional Considerations for Special Situations
Stripped lug nuts (wheels):
If you encounter a stuck wheel lug nut, it might be due to a common issue, such as low tire air pressure, inadequate lug torque, or premature wear on the brake dust shield.
- Always refer to your vehicle manual for lug nut removal advice.
- Ensure sufficient tire pressure and follow established lug tightening procedures.
- Replace the wheel at the next opportunity.
In conclusion, removing snugly stripped nuts requires the combination of preparation, strategic maneuvering, and perseverance. By adhering to this step-by-step guide and utilizing the right tools and techniques, you should successfully break free the stubborn nuts and salvage your hardware investments. Remember to approach stripped nuts with patience, foresight, and persistence.
How to remove a snug stripped nut?
So first off, that nut SHOULD NOT GO BACK ON THAT STOP. I’d suggest a large adjustable wrench tightened on stop body, make sure it’s tight and doesn’t move on the valve body. Then a pair of 10″ or larger lock and groove joint pliers (channel locks or water pump pliers depending on where you live) or even a pipe wrench 8″ or larger tightened on the nut itself. If you can’t grab the nut at the top of the supply line easily a basin wrench will grab the nut up there and you may need that adjustable to help spin the basin wrench. Then replace the entire supply line with a stainless steel braided one (the nuts are attached to it so new nuts). Take the old one with you to Lowe’s or Walmart and make sure the nuts are the same size on both ends and the new supply line is the same size or longer. They’re separated by lavatory or toilet.
Vice grip
Knipex pliers work great for situations like this
Vice grips then replace it.
[removed]
Hold the valve with an adjustable wrench and use a pipe wrench on the nut
Is that polyb? Usually that gray pipe indicates you need to replace all your water lines…
WD40
Vise-Grip 7LW I believe will do the job. Note, they have a 4LW, a 7LW, and a 10LW and if you can afford it get all three–they seem to be discontinued and they’re very handy things to have. These are different from the locking pliers–they are specifically intended for nuts and are the goto for things like rusted brake fittings.
A small [pipe wrench]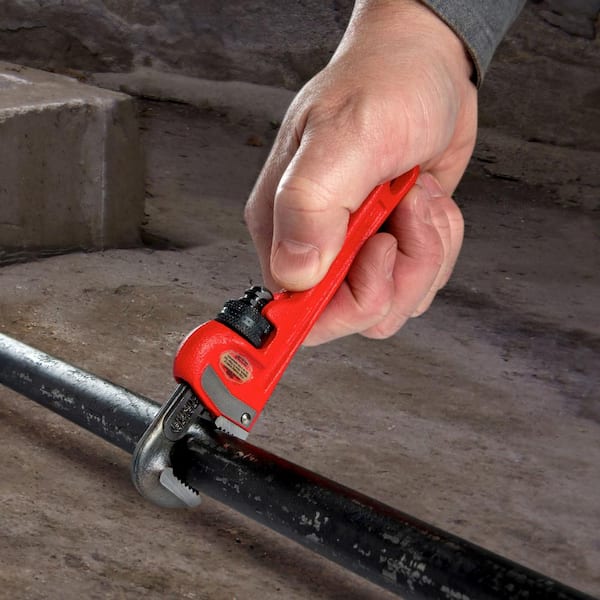 ).
).
¯\_( ͡❛ ͜ʖ ͡❛)_/¯
Heat with torch…lightly nut only…..vise grip lefty loosey….make sure water is off